How to Memorise the Notes on Guitar
If you want to do anything creative, such as improvising or composing on guitar; then it is vital to learn where the notes go on the neck. It’s true, there are some people that have never learned any music theory in their life, can’t name a single note on the guitar neck, and can play great music and write hit songs.
But they are in the minority. The vast majority of musicians who are capable on their instrument can name the notes on their instrument.
Naming the notes on the guitar will allow you to not only apply music theory concepts to your improvising, songwriting and soloing, but it will also help you understand those concepts on a more meaningful level. It is easy to read a music theory concept and say “that makes sense”, but, actually taking the concept onto your guitar, playing it and listening to it in action will help you understand the theory and use it.
So, if we want to use music theory to our advantage, to open up our creativity when it comes to improvising and composing, we need to know the notes on out guitar like the back of our hand.
We will take a look at several different approaches for learning the notes, some different learning methods that we can use to our advantage, and also exactly how to practise these ideas, to make sure we learn the notes as completely as possible.
An Unconventional Start
Before we start learning the notes on our neck, there is a skill we need to take a minute to get the hang of: Saying the notes in reverse order.
Now… you might think this is a bit crazy, but the first stumbling block, that I have seen every beginner hit, is not knowing their alphabet backwards.
And why would you know it backwards? You only learned it in one direction.
So, we can say the following notes in order:
A B C D E F G
But we also want to make sure that we can say them in the following order:
G F E D C B A
So, take a minute, saying your alphabet out loud, from A, to G and back to A:
A B C D E F G F E D C B A
It’s very important that you say this out loud. It activates different areas of your brain, and when you hit multiple areas of your brain at once, you learn a lot faster than just using one area.
Learning The Notes On Each String
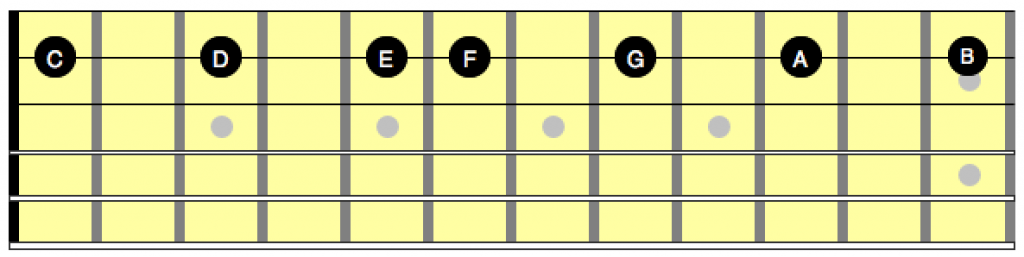
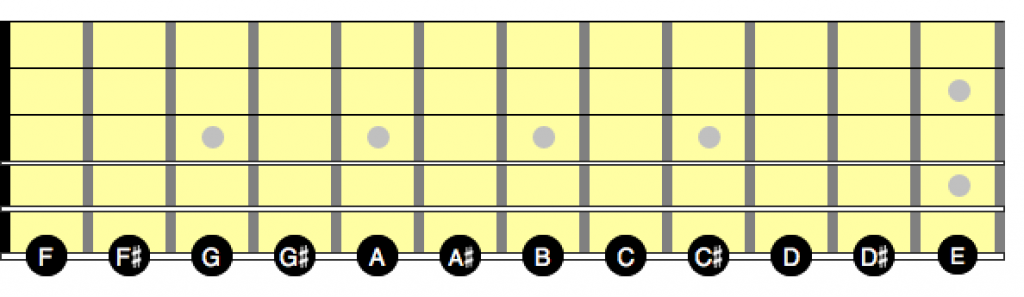
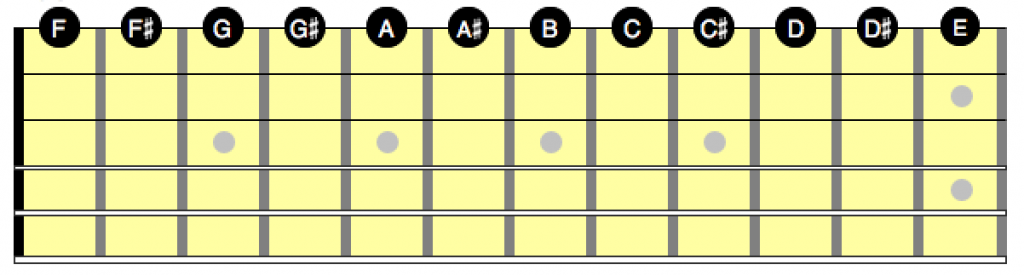
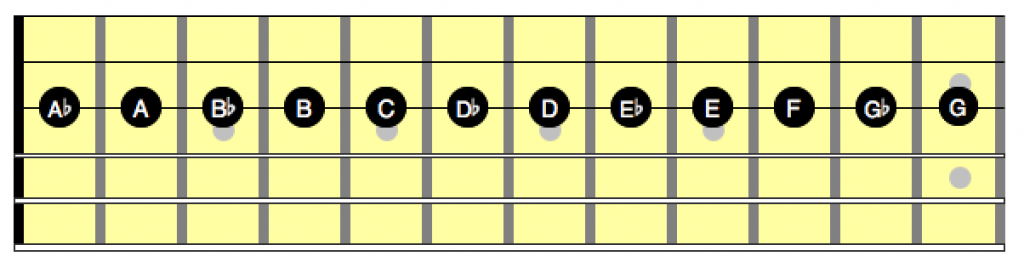
Let’s start with the notes along the 6th string:
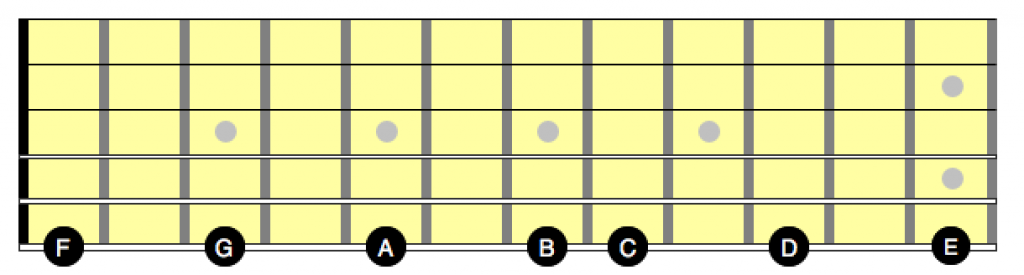
Play each note one at a time, saying the note out loud as you go. Saying the note out loud as you go is very important - make sure you do this!
You’ll play up and down the notes from fret 1, and then down and up the notes from fret 12, as follows:
Repeat this 5 times. Then, move onto the next string.
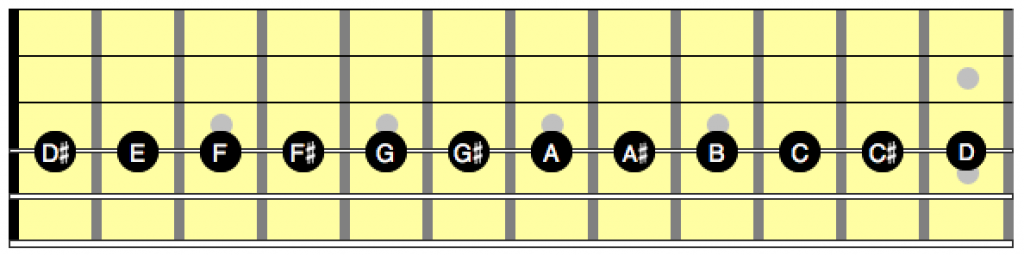
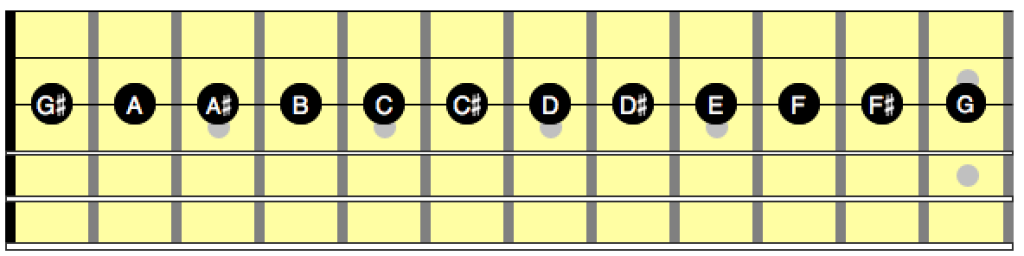
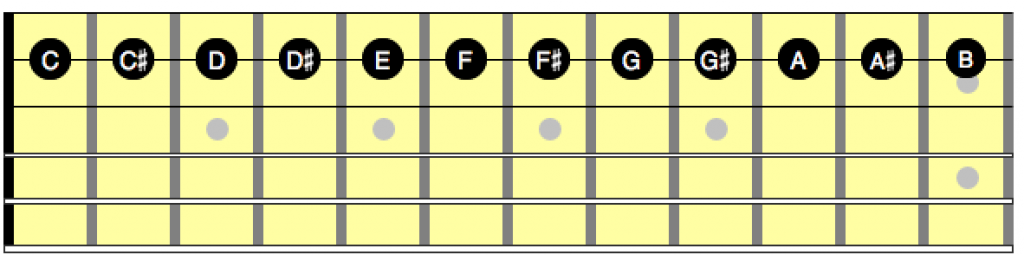
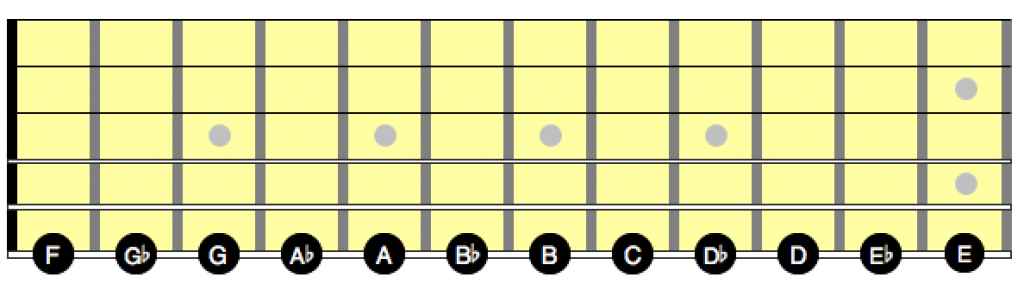
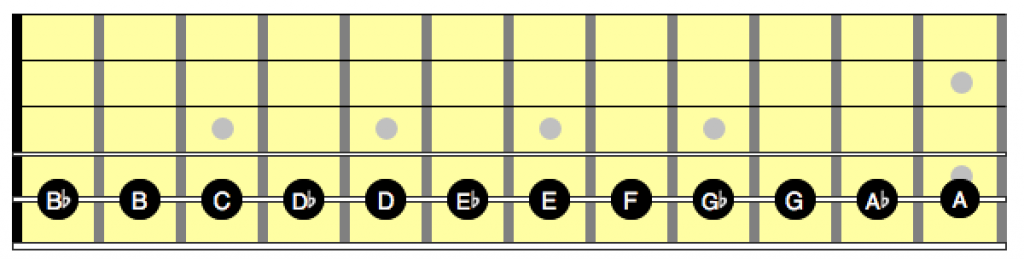
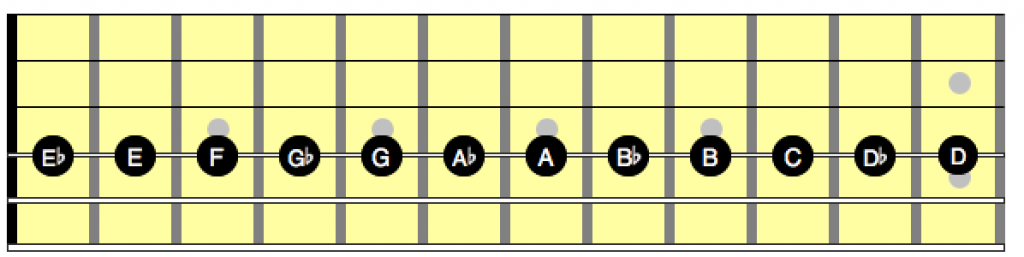
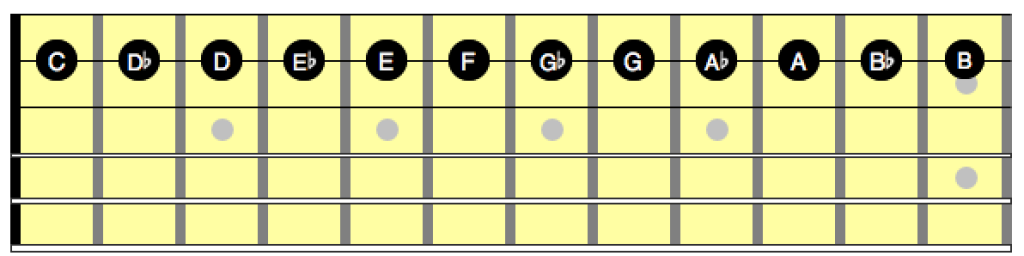
Here are the notes on the following strings. Make you you work through them as above:

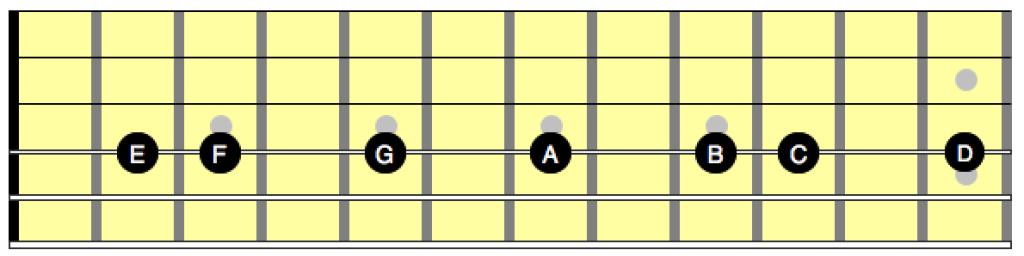
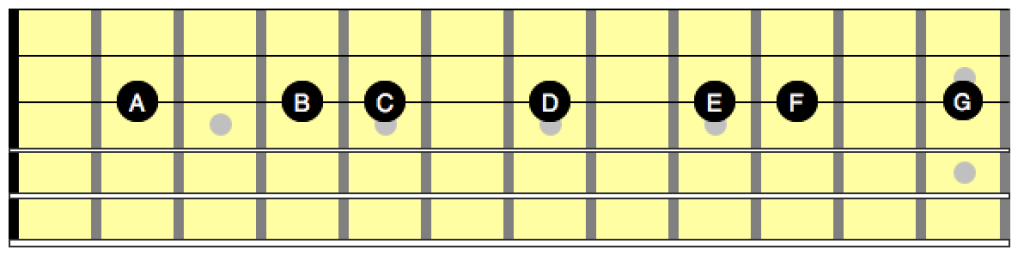
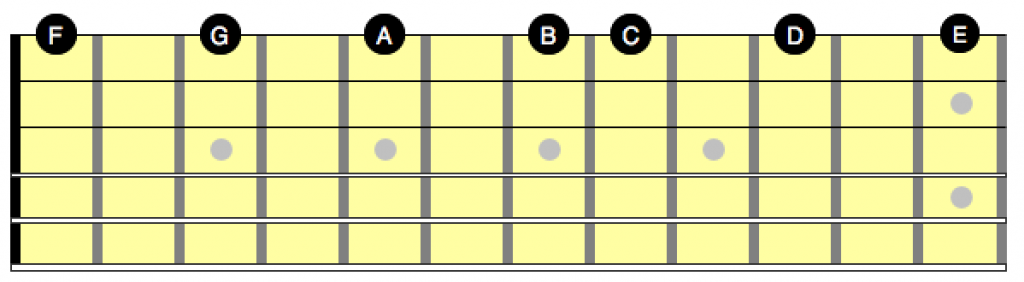
Quick notes:
- Work through these one at a time.
- Do each one 5 times.
- You start at the lowest note, go through to highest, and back down
- Then start at the highest note, to through to the lowest and back up
- Play each note once, saying it’s name out loud
- We are not going for speed or musicality here, just taking our time.
Rotating Through Notes In String Order
Now we are getting used to where the notes go along each string, we want to change our thinking and our approach slightly.
We are going to work through the notes in the following order:
C G D A E B F
Finding each note, in string order. Finding the notes in string order is very important.
So for example, we would start with C, and slowly work through finding the C notes on each string:
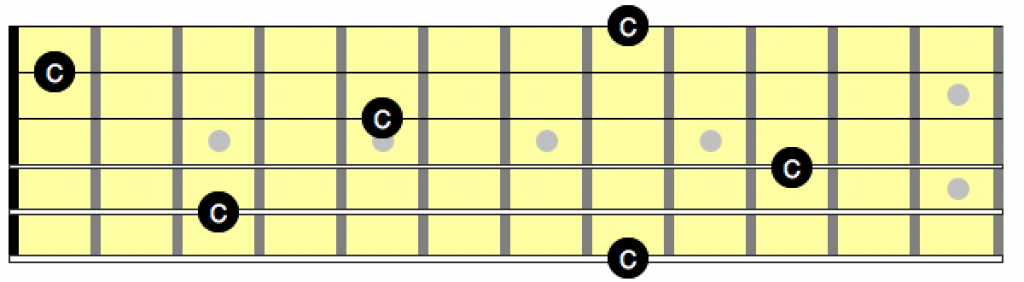
And here is a tab to make sure you are playing those notes in the right order:
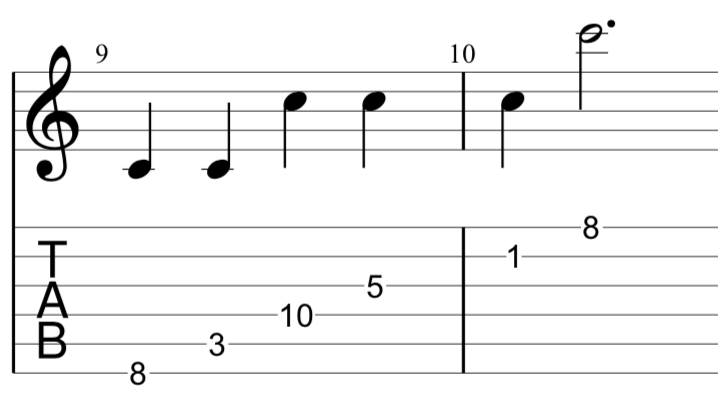
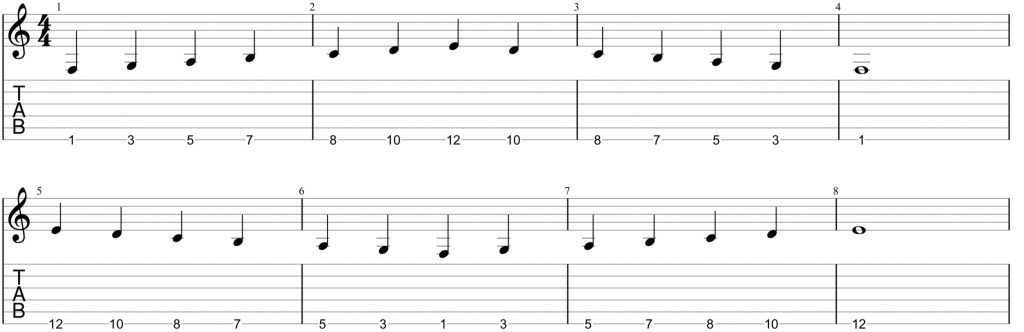
Again, we want to play up and down the strings, when doing this, as follows:
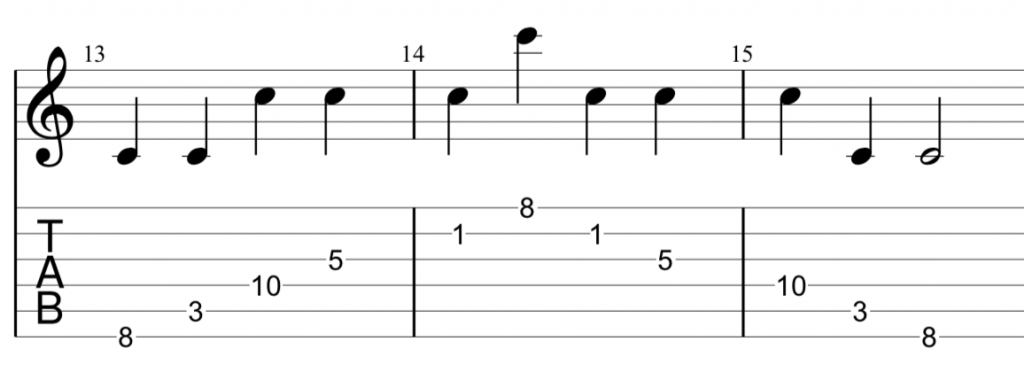
Repeat the exercise 5 times, then work through the other notes listed above - in the order that they are written in.
You do each note 5 times, up and down the strings.
What Are Sharps and the Flats?
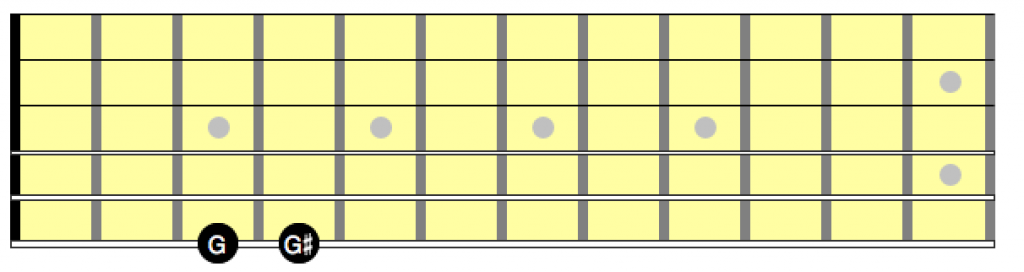
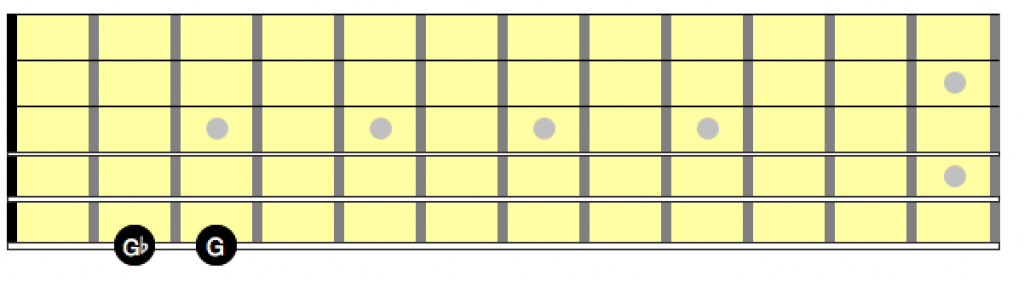
You may have noticed that there are some blank spots on our guitar neck, between the notes, that we have not yet looked at.
These are called the sharps and flats.
The fret above a note, is the sharp of that note.
The fret below a note, is the flat of that note.
Observe this example with the note G:
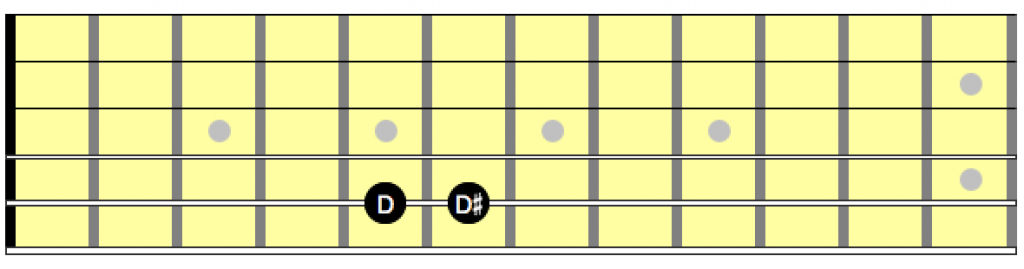
And with the note D:

Now, this brings up and interesting problem.
You may have noticed, that each fret how has two possible names. Observe:
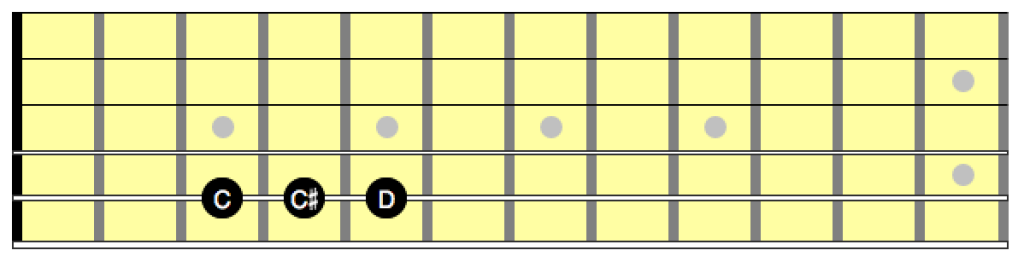
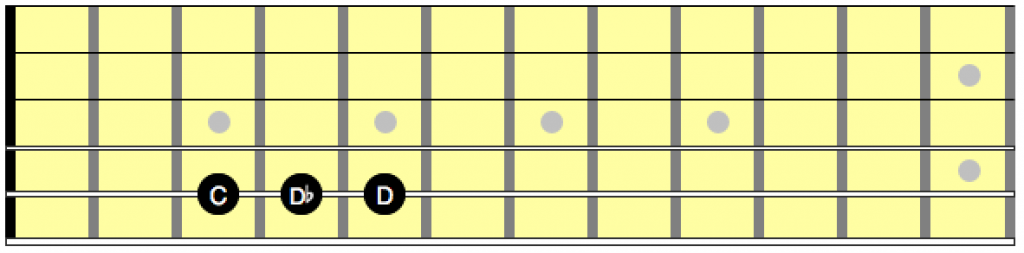
So which is right, or ‘correct’? While we get the same pitch-class from either name, the correct name depends on the key that we are in. For the moment, I don’t want you to think about this, it is something to be learned at a later date.
For now, just realise that every note has two names. That C# is the same sound and fret on your guitar as Db.
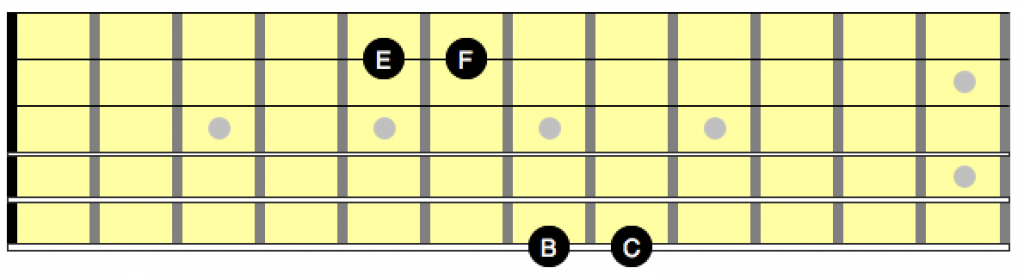
One instance of this that tends to catch people out is when we deal with the notes B and C; and E and F.
If you remember from earlier, B and C are adjacent to each other; as are E and F:
And if we wanted, we could call these frets as follows:
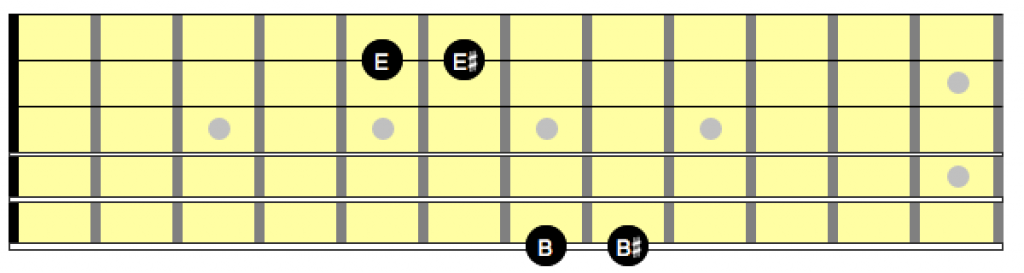

However, we will stick to called F, F, and not E#. We only use E# for some slightly awkward keys that again, will be covered at a later date.
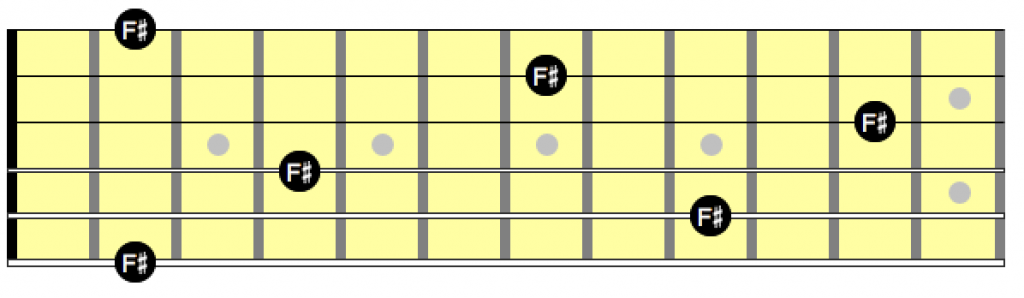
Learning Sharps and Flats on the Neck
To learn these in a more complete manner, we will repeat the first two exercises, this time adding in first the sharps:

and then the flats:

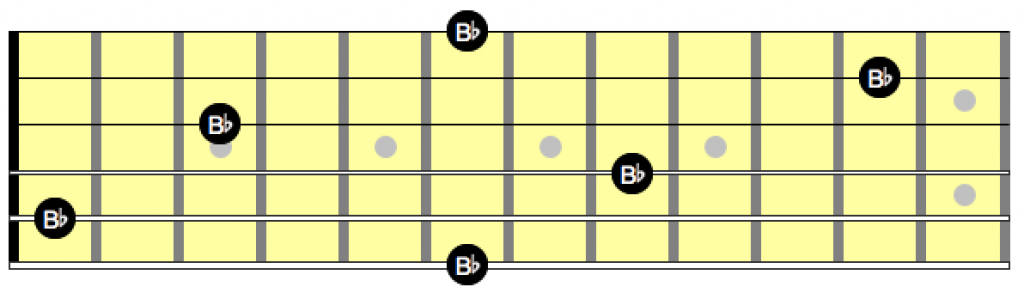
Now we can repeat the above exercise where we worked through the notes string by string, but this time, with the full range of notes.
For example, we could find all the F# notes, string by string, as follows:
Or all the Bb notes:
Final Exercises
Work through each string, finding following notes in string order (e.g. you find the note on the 6th string, then the 5th string, then the 4th string, etc):
C G D A E B F# Db Ab Eb Bb FF A# D# G# C# Gb B E A D G C
How to Find More Time to Practice
This is an exercise that we don’t necessarily need the guitar for, and there are several ways we can practice this without the guitar. The beauty of this, is that we can take an enormous amount of “dead time” during the day and transform it into productive time, that benefits our guitar playing.
You can practice this exercise in the following ways:
With Blank Neck Diagrams
Print off some blank neck diagrams and take them with you. You could:
- Fill in the notes string by string
- Start and a different point each time and fill in the notes
- Take one note, and find it on all the strings
You can them fill them out on the train, on the bus, while you are commuting, while you wait for a doctors appointment.
Working Through the Exercises in Your Head
You can visualise or picture the fretboard in your head and work out the notes along each string. This is a very powerful exercise, and you don’t need anything for it aside from your imagination.
You can do these before falling asleep each night. Lie in bed, and picture the notes in your head, working through them one by one. You can do this when you are on the bus, or waiting somewhere. If you are waiting in line at the supermarket, you can work through the notes in your head. If you wake up in the night, you can work through the notes in your head. Sitting on the toilet… ? You get the idea.
Conclusion
Knowing the notes on the guitar is absolutely vital to any guitar player who wants to make progress and take their playing to the next level.
We have comprehensively looked at not only where the notes on the neck are, but how to work through them in different ways, so that you learn them effectively.
Spend 5-10 minutes each day on this, or more using the ideas in “How to Find More Time to Practice”, and you will quickly find that you start to master this skill on guitar.